Server Administration
Tutorials and Infos about Servers
Tutorial - How to create a Server (Linux)
Sometimes it's not enough for one to play on others servers. You want your own, with own maps, own server controller and own power over everything. In this tutorial you will learn how to set up your own server.
This tutorial is for Linux only. For Windows please read our Windows tutorial.
Step 1 - Creating a User
We need to create an extra user and switch to it. Never run a server as root user! So just in case someone could get access to your VPS or dedicated server through the game server, the attacker only has permissions as that user, and not as root.
sudo adduser tmserver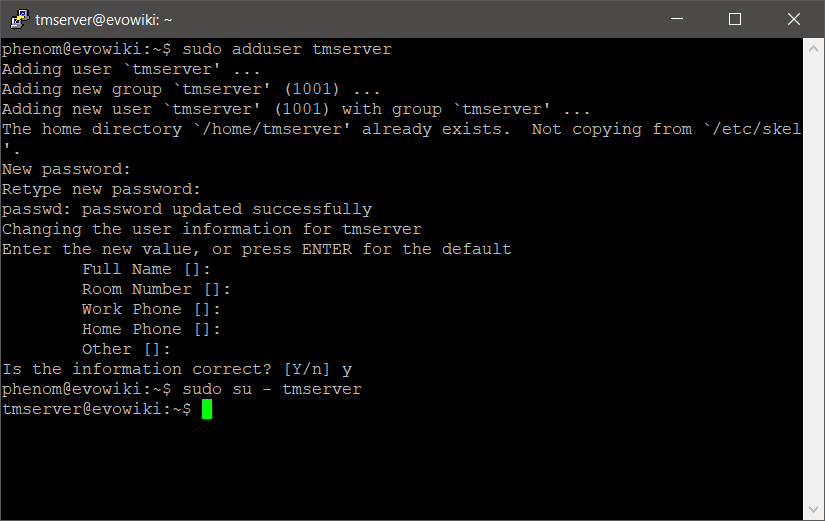
Choose a secure password, and ignore every other information. Enter Y if asked if this information is correct. Then log into the user we just created.
sudo su - tmserverStep 2 - Downloading the Server
Now it's time to download and extract the server. To do so, we first use wget to get the file, and then unzip to extract it. You may need to install unzip on your system if not already done. The URL we are using contains the latest server.
wget http://files.v04.maniaplanet.com/server/TrackmaniaServer_Latest.zip
unzip -q TrackmaniaServer_Latest.zip -d ./server/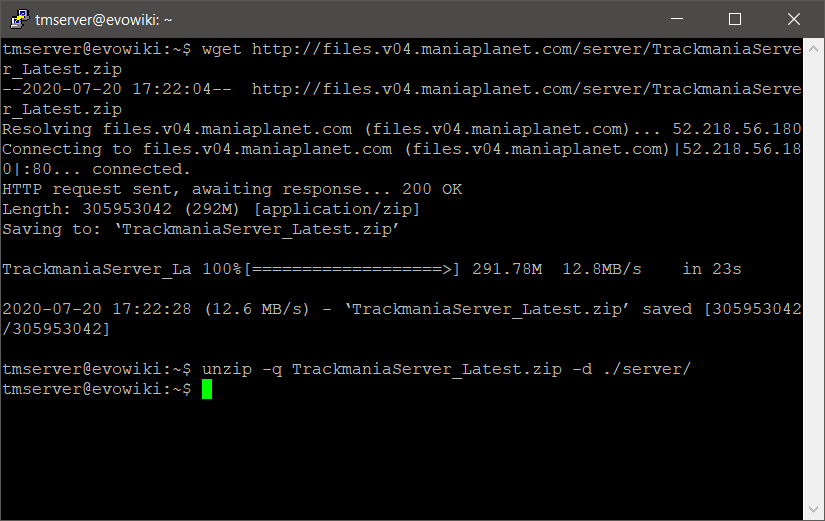
That way you will extract the files into the ./server directory.
Step 3 - Configuration
Of course you have to modify the config file in order start the server online. Switch into the config directory, copy or rename the example config, and edit it. I will go through each section you need to make changes to.
cd ./server/UserData/Config/
cp dedicated_cfg.default.txt dedicated_cfg.txt
nano dedicated_cfg.txt
First of all, you should make changes to the authorization levels. Switch out the passwords with something more secure.
        <authorization_levels>
                <level>
                        <name>SuperAdmin</name>
                        <password>MyUltraSuperSecurePassword</password>
                </level>
                <level>
                        <name>Admin</name>
                        <password>MyUltraSuperSecurePassword</password>
                </level>
                <level>
                        <name>User</name>
                        <password>MyUltraSuperSecurePassword</password>
                </level>
        </authorization_levels>
Then you should enter your master server details you can get from here. This is the account a server uses to identify itself at the master server.
        <masterserver_account>
                <login>evowiki</login>
                <password>SomePasswordWeGotFromNadeo</password>
        </masterserver_account>
After that the only thing to do is setting a server name. You can also adjust the player limit, the password, and some other things here.
        <server_options>
                <name>Evo Wiki</name>
                ...
        </server_options>
You are done with configuring the server.